Before configuring Idealpos for First American, ensure that you have completed the below steps:
Once you have confirmed that the above steps have been completed, open Idealpos then go to:
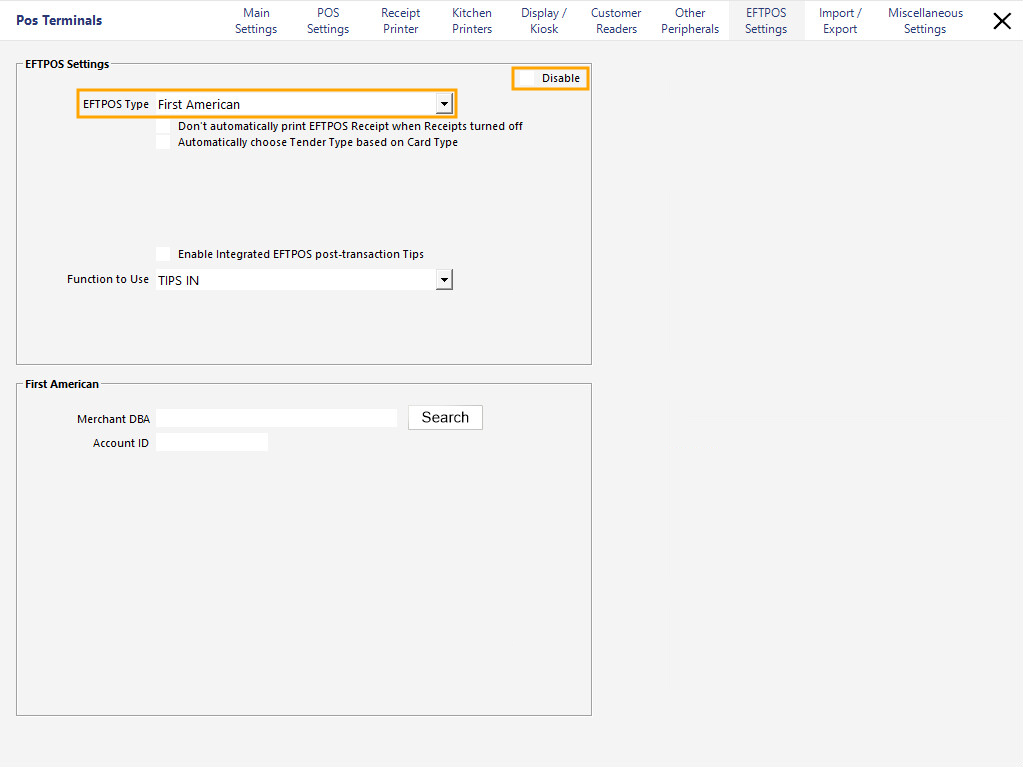
Setup > POS Terminals > Select the POS Terminal > Modify > EFTPOS Settings
Set the EFTPOS Type to First American and ensure that the Disable option is unticked
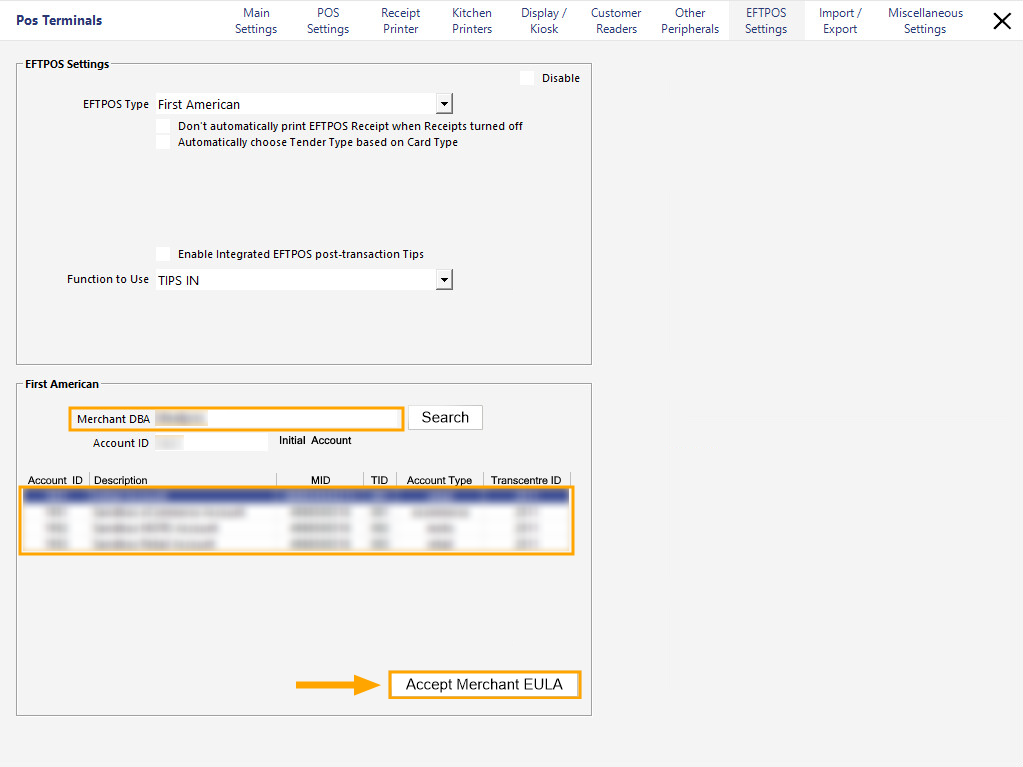
Then, under the First American section, enter your Merchant DBA and press the "Search" button.
After pressing the "Search" button, you will notice that the Account ID will be automatically populated and a list of accounts will be displayed.
Select the desired account from the list, then press the "Accept Merchant EULA" button.
After pressing the "Accept Merchant EULA" button, you may see a prompt similar to the below.
Press the "OK" button to dismiss the prompt.

Once the above configuration has been completed, you will need to restart Idealpos for the changes to take effect.
You can either restart the entire POS Terminal, or you can close the Idealpos application, then open it again.
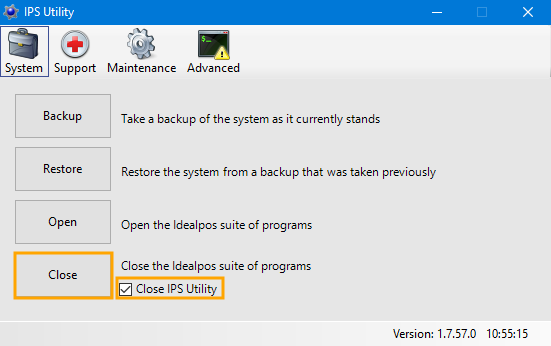
We recommend using IPSUtils to close the Idealpos suite. This will ensure that Idealpos has been closed completely and isn't still running in the system tray.
Go to Start > Idealpos > IPSUtils.
Enable the checkbox "Close IPS Utility", then press the "Close" button.
Once the IPS Utility has closed, you are ready to start Idealpos again.
Double click on the Idealpos icon on the desktop, or open Idealpos from the Windows Start menu.
Once Idealpos opens and displays the POS screen, you are ready to perform EFTPOS transactions using the First American EFTPOS Integration.